Friday, May 24, 2013

Flood Control Reservoir Tailwaters And Outflow – Planning A Trip

Fishermen might ask the question, “When is it a good time to fish a tailwater fishery?”  My usual answer is “anytime you can”.  But, how will anglers know if the outflow conditions will be suitable to their fishing without making a trip?  One of the best ways that I’ve found is to examine the following web link.

http://lrl-apps.lrl.usace.army.mil/wc/reports/lkreport.html

This link is what I use to check the flow at or nearly below any reservoir spillway outlet.  I cut my teeth fishing the Salamonie River below the dam before this report existed.  Back then, I received flow information directly from the US Army COE Office or the Salamonie River State Forest Office.

Armed with this flow information, I matched it to my mental picture of the actual water being released at the outlet and water levels viewed downstream.  An entire summer spent fishing the tailwater gave me a pretty good history and mental pictures of what I'd expect to see for particular flow rates.


Monroe Reservoir Dam and Spillway

That said, most of us aren't able to fish these areas enough to develop a history.  I have my own set of general guidelines that seem to work for me.  These are based on fishing the Salamonie River below the reservoir dam and my limited experiences fishing the tailwaters at Cataract, Monroe, Mississinewa, Patoka, and Brookville Reservoirs.
  • Flow < 100 cubic feet per second (cfs) = trickle.  Basins are generally stagnant.  If this rate has been measured for several days, expect fishing to be generally less than stellar for larger game fish.
  • Flow > 100 and < 500 cfs = slow and steady.  Basins are OK to good.  If this rate has been measured recently after a cutback of flows > 1000 cfs, then fishing should be pretty good.  Downstream pools were previously elevated, allowing for fish movement to and from these pools.
  • Flow > 500 and < 1000 cfs.  Fishing is good.  Downstream pools are elevated allowing for migrations of fish to and fro.
  • Flow > 1000 and < 1500 cfs.  Eddies are becoming faster moving at the basins and are generally smaller as you proceed downstream.  Fish are restricted to these smaller areas closer to the bank.  It can be tougher to fish here effectively in my opinion.  However, fish seem to be migrating upstream during this period.
  • Flow > 1500 and < 2000 cfs.  Fish are migrating.  Eddies are becoming fewer, thereby limiting the most fishable areas.
  • Flow > 2000 cfs.  I fish somewhere else until the flow rate drops significantly.
Remember that each river or stream below a spillway has its own set of unique physical and geographical characteristics.  In general, Salamonie and Cataract have large basins below the spillway, which may remain fishable as flow rate increases.  Mississinewa, Monroe, Brookville, and Patoka seem more like very long tubes where fishable areas are more likely to decrease with increased flow rates.  These are some of my more important observations and considerations for planning my tailwater fishing trips.

 Monroe Reservoir Tailwater

Thursday, May 23, 2013

A Build-Your-Own Rod Holder For Pier Fishing

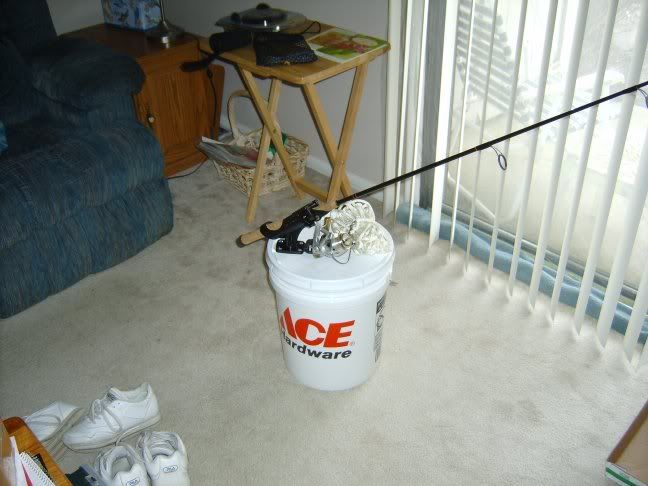
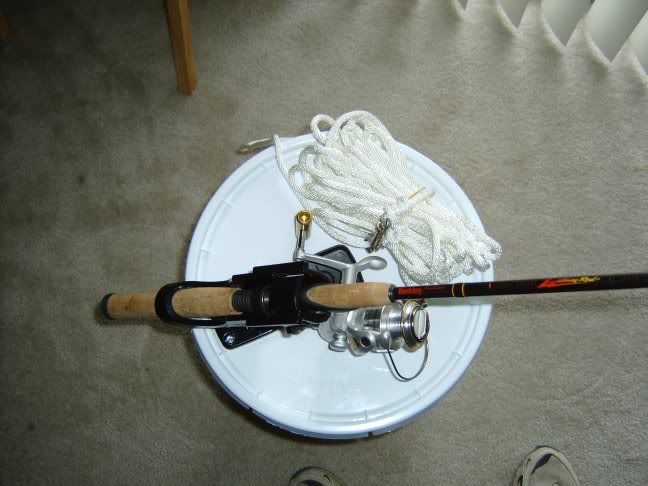
Often there are times when anglers like to still-fish natural baits and have their hands free to do other things, like cast with another rod.  Great Lakes' piers are concrete structures that extend the shoreline beyond a port or harbor.  Those like the Michigan City Pier offer few places to brace and secure a rod and reel for hands-free, damage-free fishing.  A discussion of a portable rod holder's construction follows.  I hope that this item can assist you on your next pier-fishing trip.

Components:
  • Attwood® 2in1™ Rod Holder (RH-46) or
  • Attwood® Heavy-Duty, Adjustable, 2in1™ Rod Holder (RH-40)
  • Attwood® Flush Mount Base (5022-6)
  • 5-Gallon Bucket
  • Bucket Lid
  • Galvanized Pan-head or Round-head Bolts, Washers, and Nuts (4 each)
  • 40-Foot Nylon Rope
  • Spring-loaded Clip

Tools:
  • Power Drill (?-inch)
  • Hole Saw (1¼-inch diameter)
  • Drill Bit for Bolts
  • Slot (or Phillips) Screwdriver
  • Adjustable Wrench
  • Marking Pen or Pencil


If the bucket lid is brand new, you need to cover the bucket with it and then seal the lid by pounding its edge with a mallet.  Next, break the edge seal by grabbing the tab and pulling it completely off.  To remove the lid, grab each lid section and bend them upward in succession as you move your hands around it.

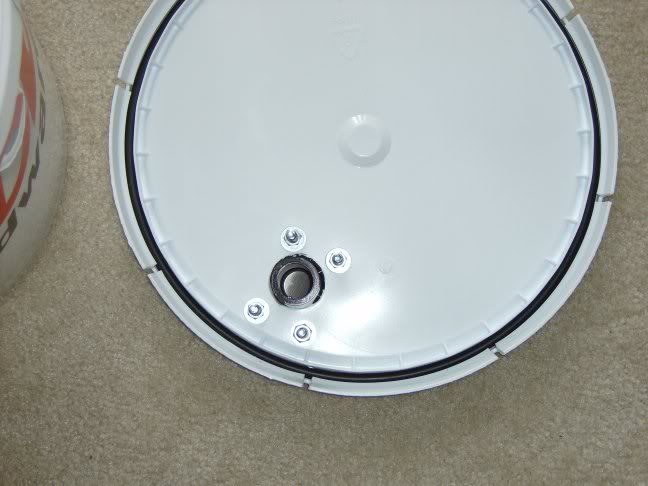
Pick a spot on the lid to place the base.  You can mark the lid’s mounting hole by placing the bottom of the base against the lid and then trace around the hole on the base.  Now, you are ready to drill the large hole for the rod holder mount.

Use the hole saw to drill the hole for the holder.  Once done, you can mount the base and mark the bolt holes for drilling.  Drill those and then secure the bolts with the screwdriver, wrench, washers, and nuts.

Now, you can attach the rope to the bucket handle by tying a secure knot (your choice).  I attached the other end to a spring-loaded clip to help with easy removal from the pier’s rebar and metal rungs.

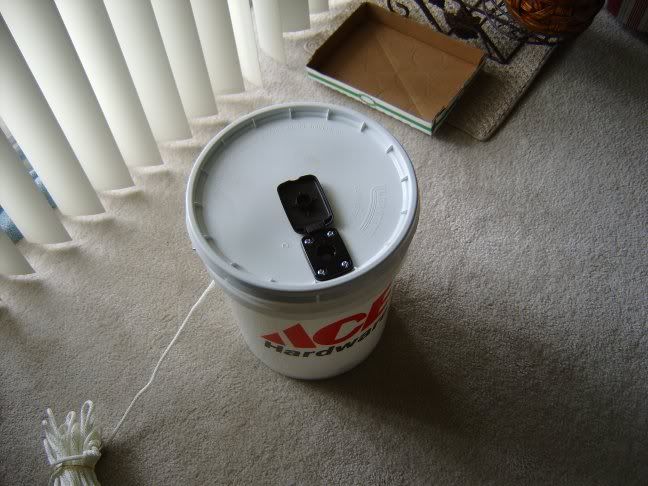
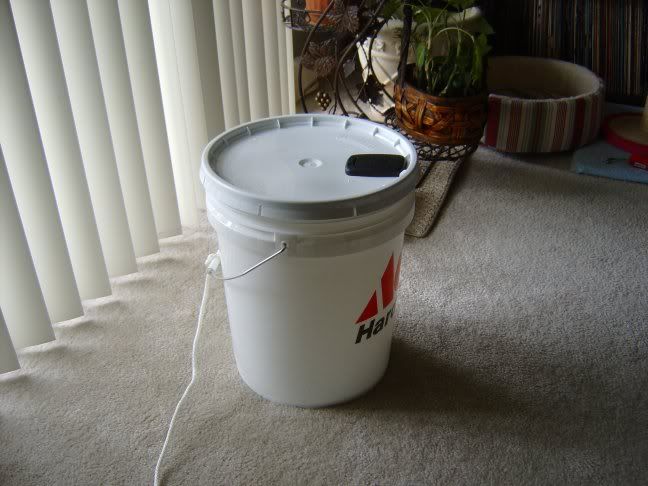
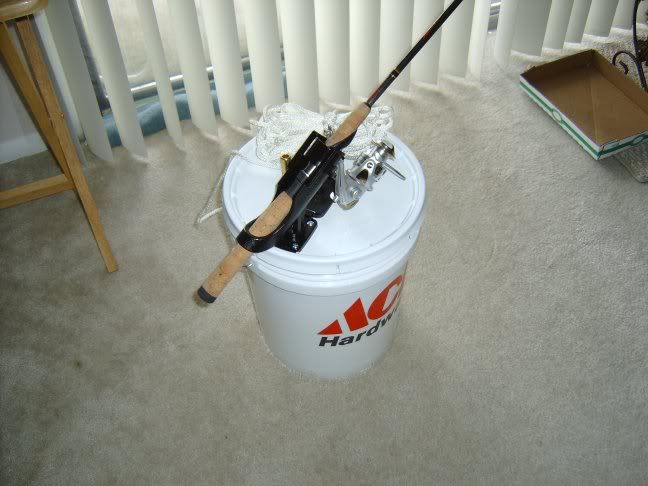
Here are some photos of the finished product:


I like this system because it is easy to assemble and take apart.  The total cost of my bucket, lid, rod holder, and flush mount base was about $20.00.  To use this, simply attach the rope to the pier, then lower the bucket over the pier’s edge and fill with water.  Pull the bucket up and then cover and seal the lid.  Open the base hole cover, drop in the rod holder, and then twist to lock it.  Add one rod, lock it in the handle holder, and then go fishing!

Crappie Time

Tied these for spring crappie.


Each jig head weighs 1/16 of an ounce. Hooks are #4 black nickel sickles. Used a lot of Sulky Holoshimmer and marabou feather plumes on those. I've done well with shiny jigs and marabou in years past. Keeping my fingers crossed for good weather and fishing for upcoming weekends.

A couple of hair jigs are included for...just in case. ;)

Have to say that I like Rosey's Mandarin Orange and Silver Sand Metallic colors so much, they're going with me this weekend. :)

A Chartreuse Variety For Crappie


Combined craft fur and marabou in a couple.  Used Sulky Holoshimmer and trilobal polyester thread for the tie downs.

A couple are full cut.  Though, most are lean on material.  Will see what the fish like this weekend.  Headed to strip pit country due west of Indy.

Thursday, May 2, 2013

Extended Body Grubs Revisited

Here are a couple of extended body grubs that I tied this evening.  Each was tied on a 1/4-oz. ball head jig with a #1 hook.

Materials:
  • Tandy Premium Leather Remnant - caramel brown
  • Lion Brand Suede Yarn - caramel
  • Harbor Freight Powder Paint - brown mixture
  • Orbit Powder Paint - clear
  • Fine craft glitter - black
  • Tandy Latigo Lace - use any color
  • Extra fine craft glitter - green
  • UTC Ultra Thread (70 denier) - black
  • Coats & Clark Machine Embroidery Thread (Trilobal Polyester 40-wt.) - chona brown